
Note: This guide covers the foundational setup for a single-team code signing pipeline. In a future post (Part 2,), I’ll try to cover enterprise improvements including:
- Multi-team workflows with branch policies and approval gates
- Git branching strategies for different environments (dev/staging/prod)
- Separate managed identities per team with granular RBAC
- Automated certificate rotation and expiration monitoring
- Integration with pull requests and code review workflows
Introduction
Here’s the scenario: You manage endpoints and servers that require signed PowerShell scripts. Maybe it’s your execution policy. Maybe it’s vendor tools that won’t run unsigned code. Either way, you need a signing solution. The straightforward approach is to export a code signing certificate from your PKI and distribute it to your teams so they can sign scripts on their own machines.
But this ‘straightforward’ approach quickly becomes a security and operational nightmare:
Security Risk: You’ve just distributed your private key to multiple workstations. If any one of those machines is compromised, your entire code signing infrastructure is at risk. Worse, there’s often nothing preventing team members from sharing the certificate with contractors, vendors, or anyone who asks.
Certificate Management Hell: When the certificate expires, you need to track down every copy, revoke them, and redistribute new ones. Good luck maintaining that spreadsheet of who has what.
No Audit Trail: Who signed what? When? Which version of the certificate? You have no centralized visibility into signing operations.
So what alternative do we have
Azure Trusted Signing Trusted Signing—Managed Signing Services | Microsoft Azure is Microsoft’s managed code signing service that handles everything—certificate issuance, HSM storage, and signing operations. In principle, it’s the most straightforward solution.
However, there are significant barriers:
- Still in preview after a long time (as of this writing)
- Geographic restrictions: US and Canada only
- Onerous signup process: Extensive proof of company ownership required
- Less flexibility: You’re locked into Microsoft’s workflow and tooling
I’ll cover Trusted Signing in a separate post, but for now, these limitations make it impractical for many organizations—especially those outside North America or needing more control over their signing pipeline.
Azure Key Vault with a DevOps Pipeline offers a middle ground: you bring your own certificate (from your PKI or a CA), store it securely in Microsoft’s FIPS 140-2 Level 2 HSMs, and build your own signing automation. You get:
- Full control over certificate procurement
- Works globally, today
- Flexible integration with any CI/CD pipeline
- Transparent pricing (Key Vault costs, not per-signature fees)
This approach requires more initial setup, but that’s what this guide is for.
Prerequisites
Before we build the pipeline, you’ll need the following resources. Don’t worry if you haven’t set some of these up yet—we’ll walk through the configuration steps in this guide.
Azure Resources:
- Azure subscription with Owner or Contributor access
- Azure DevOps organization and project (we will create this together if needed)
Code Signing Certificate: You have two options:
- Internal PKI: Export a certificate from your organization’s certificate authority
- Commercial CA: Purchase from DigiCert, Sectigo, GlobalSign, etc.
The certificate must be:
- Code signing certificate (EKU: 1.3.6.1.5.5.7.3.3)
- Exportable as .pfx with private key
- Valid for at least 1 year
Tools:
- PowerShell
- Azure CLI or Azure PowerShell module
- Git (optional we can manually add files for testing)
Setup
Part 1: Creating Your Code Signing Certificate
This section walks through creating a code signing certificate from your internal PKI (Active Directory Certificate Services). If you’re using a commercial CA instead, skip to Part 2: Azure Key Vault Setup.
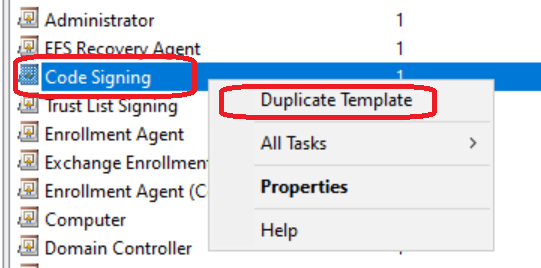
Step 1: Duplicate Your Code Signing Template
In your Certificate Authority console, duplicate your existing code signing certificate template. We’ll modify several settings to ensure security and compatibility.
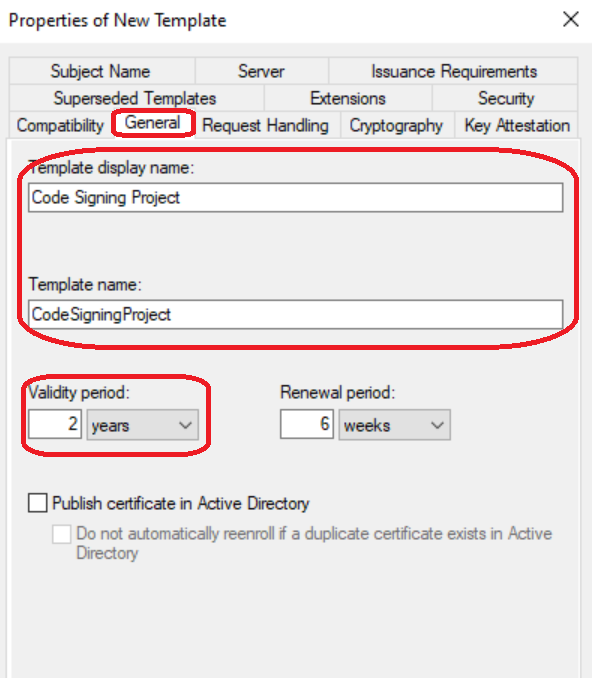
Step 2: Configure General Settings
Certificate Name:
Change the template name to something descriptive (e.g., “CodeSigningProject”).
Validity Period:
Set to 1-2 years maximum. While you can set longer validity periods, shorter lifespans limit exposure if the certificate is compromised.
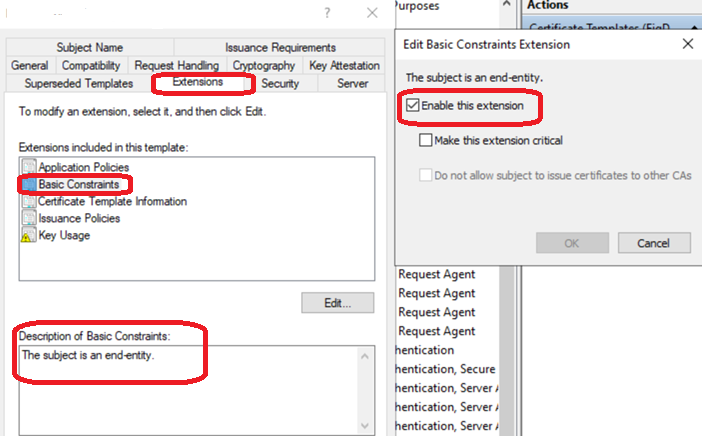
Step 3: Configure Extensions
Enable Basic Constraints:
Navigate to Extensions > Basic Constraints and enable this extension.
Why this matters:
This setting explicitly declares “this certificate can only sign code—it cannot issue other certificates.” If your code signing certificate were compromised, this prevents an attacker from using it to create their own certificate chain. The “End Entity” designation (pathLength = 0) ensures it’s not treated as a Certificate Authority.
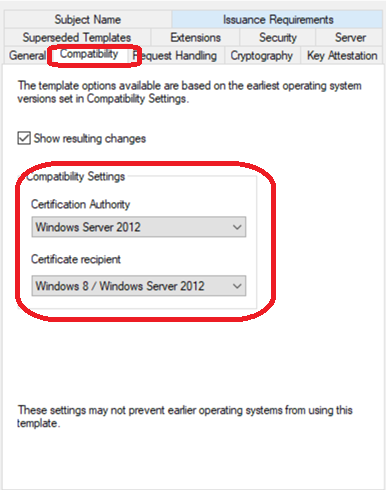
Step 4: Set Compatibility Level
Change compatibility to Windows Server 2012 in both the Certificate Authority and Certificate recipient tabs.
Why Windows Server 2012?
- SHA-256 Support: First version with full SHA-256 support (SHA-1 is cryptographically weak and deprecated)
- Modern Cryptography: Supports Cryptography Next Generation (CNG) providers required for:
- Stronger RSA keys (2048-bit minimum, 4096-bit recommended)
- Modern hashing algorithms
- Proper Enhanced Key Usage extensions
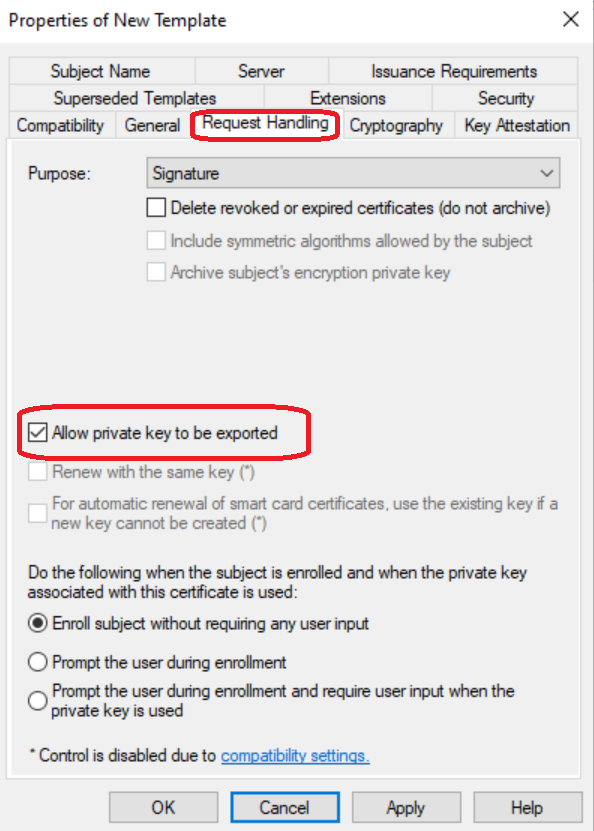
Step 5: Enable Private Key Export
Navigate to Request Handling and check “Allow private key to be exported”.
Why enable export? Isn’t that insecure?
This seems counterintuitive, but it’s actually secure when done correctly:
- One-time export: You need the exportable flag once to create a
.pfxfile for Azure Key Vault import - HSM protection: Once imported to Azure Key Vault Premium’s HSM, the key is stored in FIPS 140-2 Level 2 certified hardware that does not permit extraction
- Clean up: After import, you securely delete the local
.pfxfile - Final state: The key exists only in the HSM—it can never be exported again
Think of it as a one-way door: the exportable flag lets you move the key into the vault, but Azure’s HSM prevents it from ever leaving.
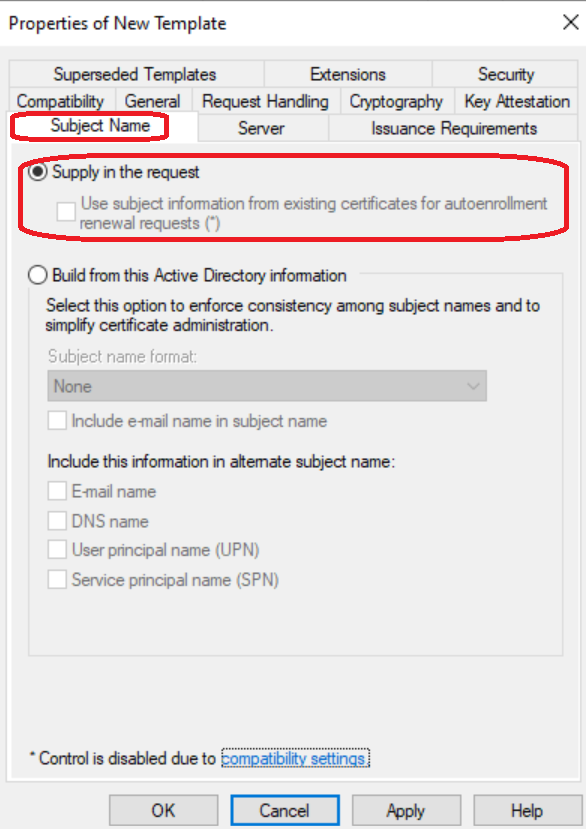
Step 6: Configure Subject Name
Set Subject Name to “Supply in the request”.
Why this matters:
This allows you to specify your organization’s details (company name, location, etc.) rather than using generic Active Directory user information.
Security note: This doesn’t create a security risk because:
- Your CA administrator still approves all certificate requests
- Only authorized users can request certificates from this template
- All requests are logged and audited
- Access controls are enforced by template permissions and Azure Key Vault RBAC
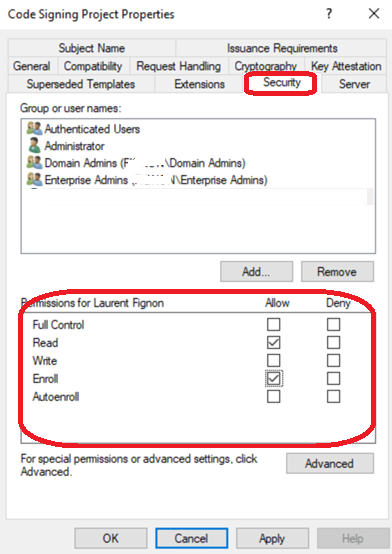
Step 7: Set Permissions
In the Security tab, add the user who will request the initial certificate.
Grant them:
- Read permission
- Enroll permission
Note: These permissions are only needed once to request the certificate. You can remove them after the certificate is issued and imported to Azure Key Vault.
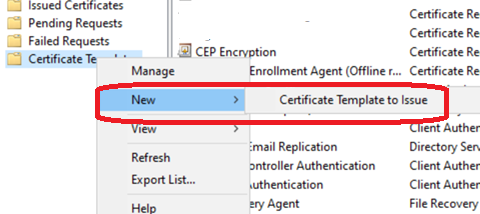
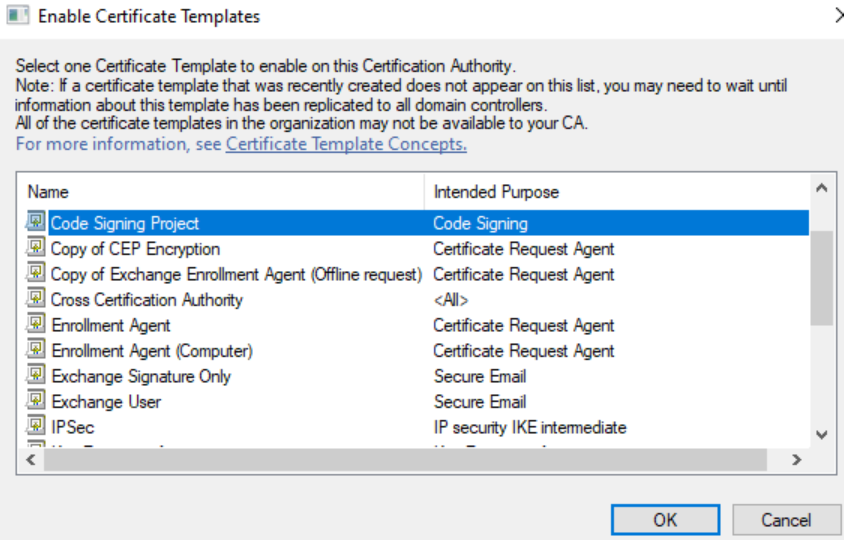
Step 8: Issue the Certificate Template
Save your changes and issue the certificate template from your Certificate Authority.
Step 8: Issue the Certificate Template
Save your changes and issue the certificate template from your Certificate Authority.
Requesting the Certificate
Important: You cannot request Windows Server 2012 certificate templates through the web interface (https://certsrv). Use the PowerShell method below instead.
Step 1: Create the Certificate Request File
Run this PowerShell script, replacing the Subject and CertificateTemplate values with your own:
Note on ProviderName: If you’re on a newer system with CNG provider support, you can use "Microsoft Software Key Storage Provider" instead. The script above uses the older provider for compatibility with older servers.
# Create the temp directory if it doesn't exist
New-Item -ItemType Directory -Path "C:\temp" -Force

# Certificate request INF file content
$inf = @"
[NewRequest]
Subject = "MyCodeSigning, O=My Company, L=London, C=GB"
KeyLength = 2048
KeyAlgorithm = RSA
HashAlgorithm = SHA256
Exportable = TRUE
MachineKeySet = FALSE
ProviderName = "Microsoft Enhanced RSA and AES Cryptographic Provider"
#ProviderName = "Microsoft Software Key Storage Provider"
KeyUsage = 0x80
[RequestAttributes]
CertificateTemplate = "CodeSigningProject"
[Extensions]
2.5.29.37 = "{text}1.3.6.1.5.5.7.3.3"
"@

$inf | Out-File -FilePath "C:\temp\codesign.inf" -Encoding ascii
Step 2: Submit the Request to Your CA
Replace MyCertServer\My-CA with your actual Certificate Authority details:
Note: Ensure the machine you’re running this from can reach your Certificate Authority server.
# Create the certificate request
certreq -new C:\temp\codesign.inf C:\temp\codesign.req

# Submit to your CA (replace with your CA details)
certreq -submit -config "MyCertServer\My-CA" C:\temp\codesign.req C:\temp\codesign.cer

# Install the certificate
certreq -accept C:\temp\codesign.cer
Step 3: Export the Certificate as PFX
Now export the certificate with its private key. Update the Subject filter to match your certificate’s Common Name (CN):
Security reminder: Store this password securely—you’ll need it to import the certificate into Azure Key Vault. Once imported, securely delete the .pfx file.
# Export to PFX for Key Vault import
$cert = Get-ChildItem Cert:\CurrentUser\My | Where-Object {$_.Subject -like "MyCode*"} | Sort-Object NotBefore -Descending | Select-Object -First 1

$password = Read-Host -AsSecureString -Prompt "Set A Password"

Export-PfxCertificate -Cert $cert -FilePath "C:\temp\codesigning.pfx" -Password $password
Part 2: Azure Key Vault Setup

Why Key Vault Premium?
We’re using Azure Key Vault Premium because it’s the only tier that supports Hardware Security Modules (HSMs). The HSM provides FIPS 140-2 Level 2 certified hardware protection for your private key, ensuring it can never be extracted once imported.
Now we setup the Keyvault – We are using Premium because that supports HSM
Step 1: Create the Key Vault
Run this PowerShell script to create your resource group and Key Vault: Change ResourceGroup VaultName And Region for your liking
Note: The vault name must be globally unique across all of Azure. If you get a naming conflict, choose a different name.
# Variables
$resourceGroup = "code-signing-vault"
$vaultName = "mycompany-signing-kv"  # Must be globally unique
$location = "uksouth"

# Create resource group if it doesn't exist
New-AzResourceGroup -Name $resourceGroup -Location $location

# Create Key Vault Premium with RBAC
New-AzKeyVault `
  -Name $vaultName `
  -ResourceGroupName $resourceGroup `
  -Location $location `
  -Sku "Premium"

# Verify RBAC is enabled
Get-AzKeyVault -VaultName $vaultName | Select-Object EnableRbacAuthorization
Step 2: Grant Yourself Access to Upload the Certificate
Before you can import the certificate, you need the Key Vault Administrator role. This script assigns the role to your user account: Change your UPN and VaultName
Important: RBAC permissions can take 2-3 minutes to propagate across Azure. Wait before proceeding to the next step.
# Find your Azure AD User ID
$user = Get-AzADUser -UserPrincipalName "your-email@yourcompany.com"
$userId = $user.Id

Write-Host "Found user: $($user.DisplayName)" -ForegroundColor Green
Write-Host "Object ID: $userId" -ForegroundColor Green

# Get the Key Vault resource ID
$vault = Get-AzKeyVault -VaultName "mycompany-signing-kv"

Write-Host "Key Vault: $($vault.VaultName)" -ForegroundColor Green
Write-Host "Resource ID: $($vault.ResourceId)" -ForegroundColor Cyan

# Assign Key Vault Administrator role at the Key Vault scope
New-AzRoleAssignment `
    -ObjectId $userId `
    -RoleDefinitionName "Key Vault Administrator" `
    -Scope $vault.ResourceId

Write-Host "`nRole assignment created. Waiting for propagation..." -ForegroundColor Yellow

# Verify it was added
Get-AzRoleAssignment -ObjectId $userId -Scope $vault.ResourceId | Format-Table RoleDefinitionName

Write-Host "`nWait 2-3 minutes for RBAC propagation, then try importing the certificate." -ForegroundColor Yellow
Step 3: Import Your Certificate to Key Vault
Now import the .pfx file you created earlier: change the vaultname
# Set your Key Vault name
$vaultName = "mycompany-signing-kv"  # Replace with actual name

# Import the certificate
$pfxPassword = Read-Host -AsSecureString -Prompt "Password"

Import-AzKeyVaultCertificate `
  -VaultName $vaultName `
  -Name "powershell-code-signing" `
  -FilePath "C:\temp\codesigning.pfx" `
  -Password $pfxPassword
Security checkpoint: Once the certificate is successfully imported, you should securely delete the .pfx file from your local machine. The private key now exists only in the HSM and cannot be extracted.
Securely delete the PFX file
Remove-Item "C:\temp\codesigning.pfx" -Force
Part 3: Create the Managed Identity
Azure DevOps will use a Managed Identity to authenticate to Key Vault and perform signing operations. This eliminates the need for storing credentials in your pipeline.
Step 1: Create the Managed Identity
Change the $miname and location + resource group to your liking
Keep these outputed values: You’ll need the Client ID and Resource ID when configuring Azure DevOps in the next section.
# Create the managed identity
$resourceGroup = "code-signing-vault"
$miName = "code-signing-prod-identity"
$location = "uksouth"

New-AzUserAssignedIdentity `
    -ResourceGroupName $resourceGroup `
    -Name $miName `
    -Location $location

# Get the details you'll need
$mi = Get-AzUserAssignedIdentity -ResourceGroupName $resourceGroup -Name $miName

Write-Host "Managed Identity Created:" -ForegroundColor Green
Write-Host "  Name: $($mi.Name)"
Write-Host "  Client ID: $($mi.ClientId)"
Write-Host "  Principal ID: $($mi.PrincipalId)"
Write-Host "  Resource ID: $($mi.Id)"
Step 2: Grant the Managed Identity Access to Key Vault
The managed identity needs two specific roles to sign code:
- Key Vault Crypto User: Allows cryptographic signing operations
- Key Vault Certificate User: Allows reading certificate metadata
Why these specific roles?
- We’re following the principle of least privilege—the managed identity gets only the permissions it needs to sign code, nothing more
- It cannot delete certificates, manage access policies, or perform administrative tasks
- This limits the blast radius if the identity is somehow compromised
# Assign Key Vault roles to the managed identity
$vault = Get-AzKeyVault -VaultName "mycompany-signing-kv"

New-AzRoleAssignment `
    -ObjectId $mi.PrincipalId `
    -RoleDefinitionName "Key Vault Crypto User" `
    -Scope $vault.ResourceId

New-AzRoleAssignment `
    -ObjectId $mi.PrincipalId `
    -RoleDefinitionName "Key Vault Certificate User" `
    -Scope $vault.ResourceId

# Verify
Get-AzRoleAssignment -ObjectId $mi.PrincipalId -Scope $vault.ResourceId | Format-Table RoleDefinitionName
Part 4: Azure DevOps Pipeline Setup
Now we’ll create the Azure DevOps pipeline that will automatically sign your PowerShell scripts whenever they’re committed to the repository.
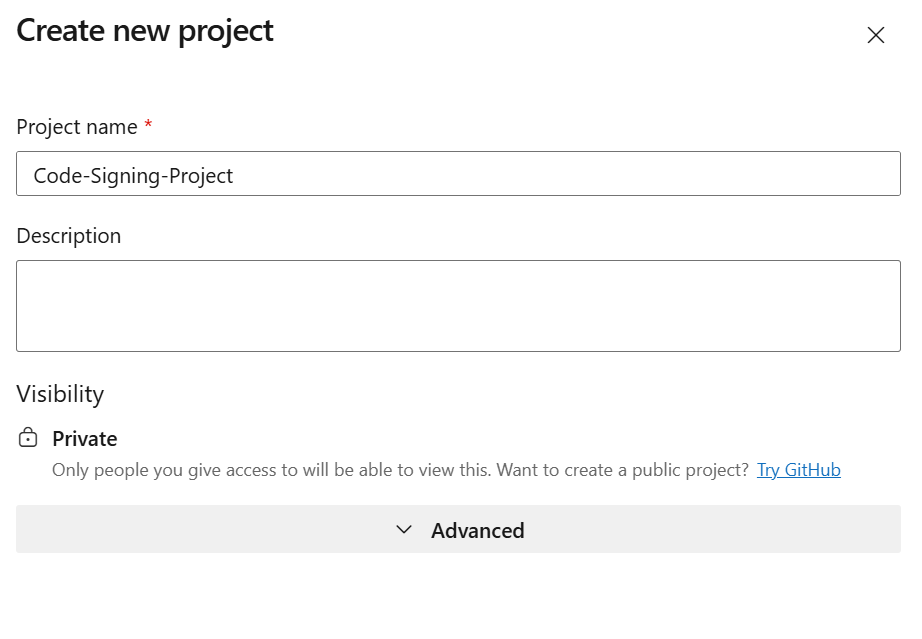
Step 1: Create Your Azure DevOps Organization and Project
- Navigate to https://dev.azure.com and sign in Alternative: If you need to create a new organization, go to https://aex.dev.azure.com first. After creating your organization, click on your
myorg.visualstudio.comlink to access the DevOps portal. - Click “New project”
- Configure your project:
- Project name: Choose something descriptive (e.g., “PowerShell-Code-Signing”)
- Visibility: Select Private
- Click “Create”

Step 2: Create the Service Connection
The service connection allows Azure DevOps to authenticate to Azure using the managed identity we created earlier.
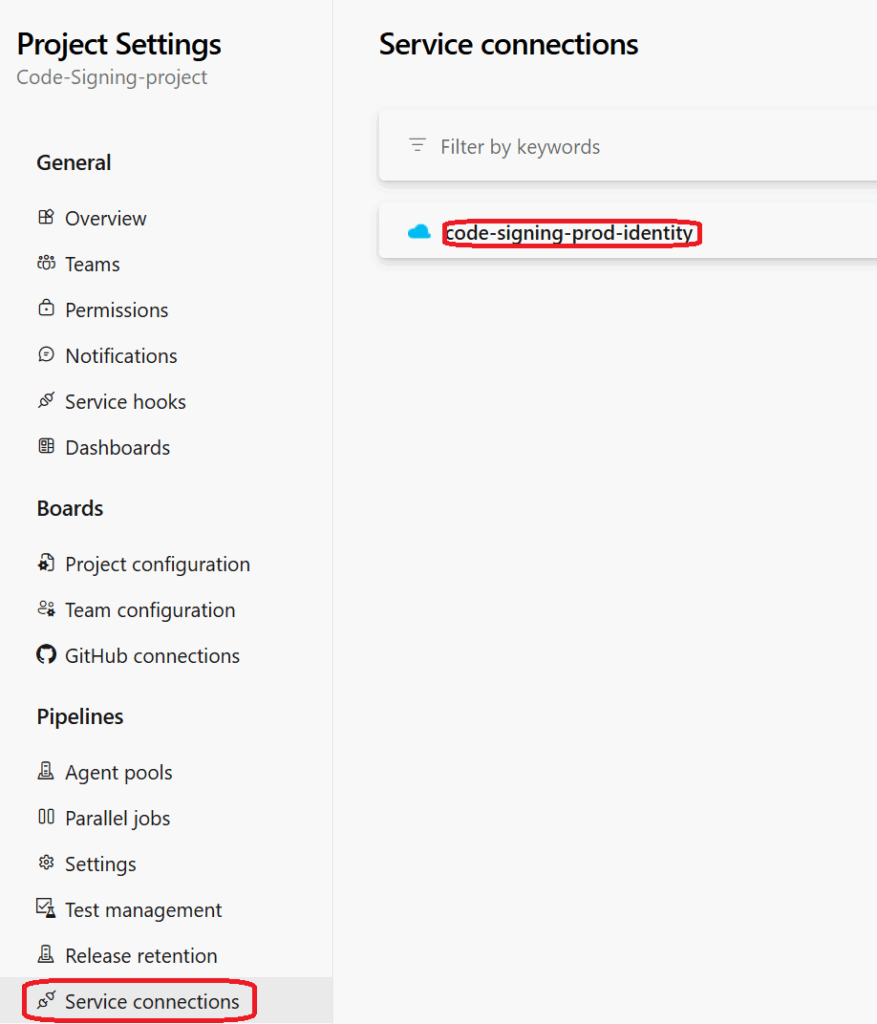
- In your project, click “Project settings” (bottom-left corner)
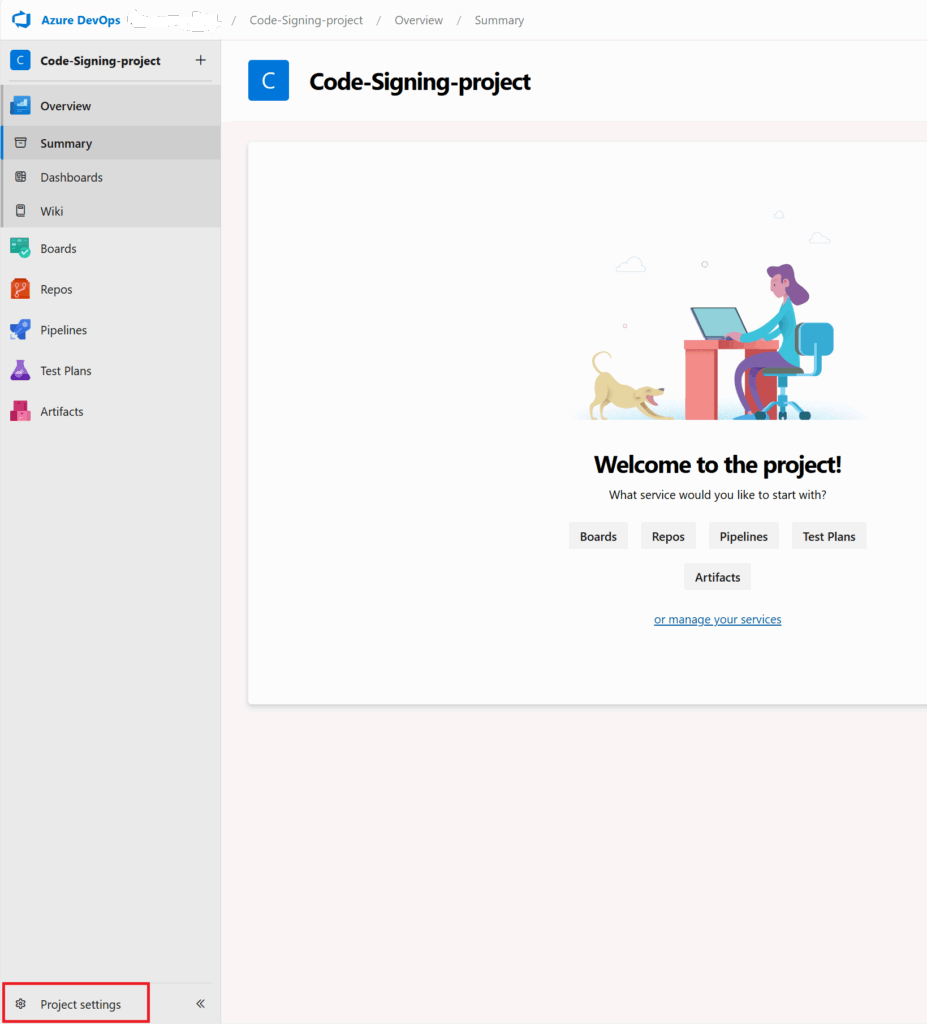
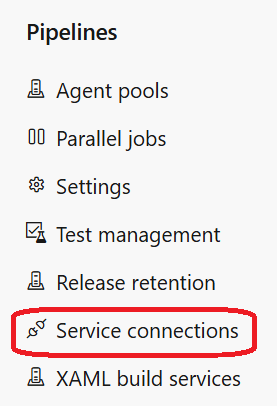
2. Under Pipelines, click “Service connections”
3. Create Service Connection
4. Select “Azure Resource Manager” → Click “Next”

5. Managed Identity: select the Managed Identity we just created
6. Configure the connection:
Subscription: Select your Azure subscription
Resource group: Select code-signing-vault (or your resource group name)
Service connection name: Use the same name as your managed identity (e.g., code-signing-prod-identity)
✅ Check “Grant access permission to all pipelines”
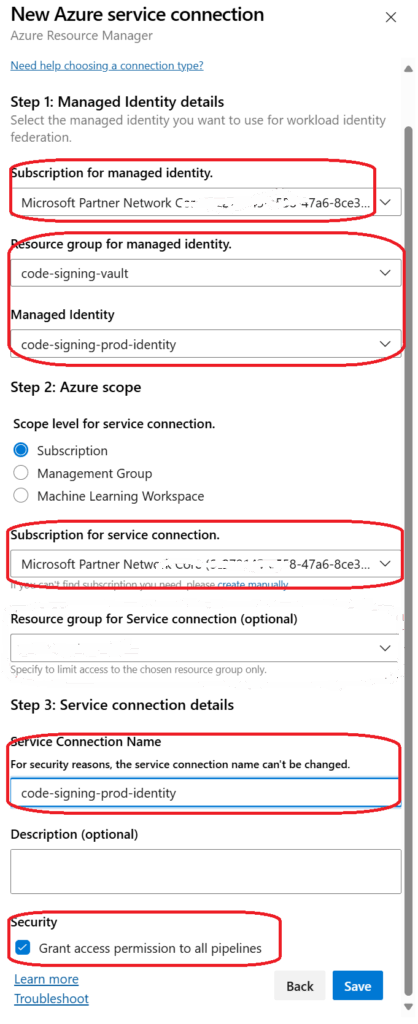
- Click “Save”
Note: Save the service connection name—you’ll need it in the pipeline YAML file.
Step 3: Initialize Your Repository
- In your project, navigate to Repos (left sidebar)
- Click “Initialize” to create the repository
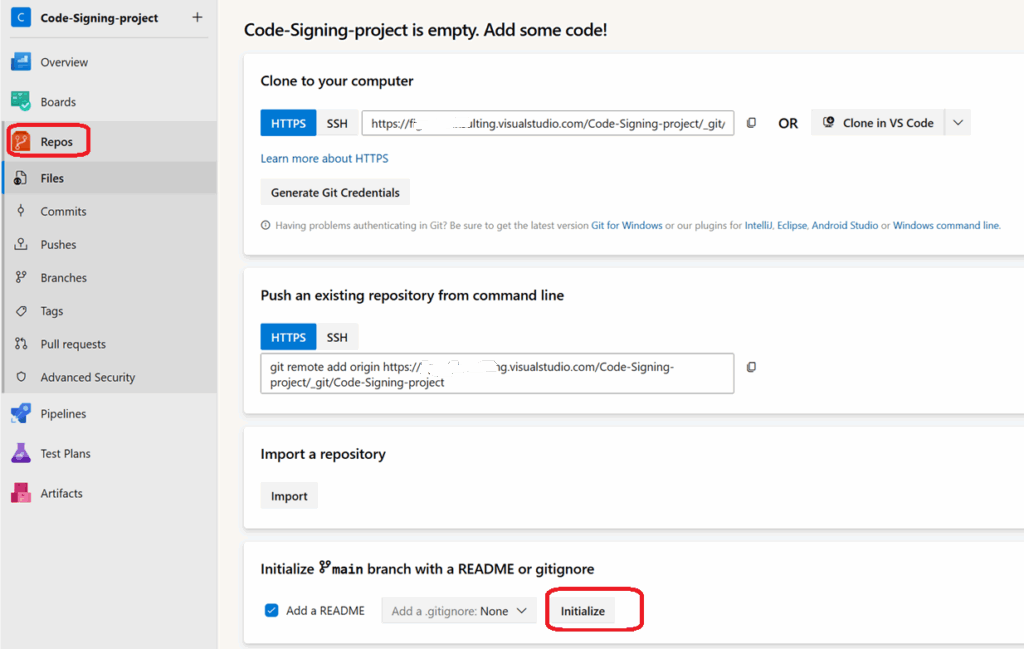
3. Create the folder structure for your pipeline: Create a scripts folder:
- Click “New” → “Folder”
- Name it
scripts
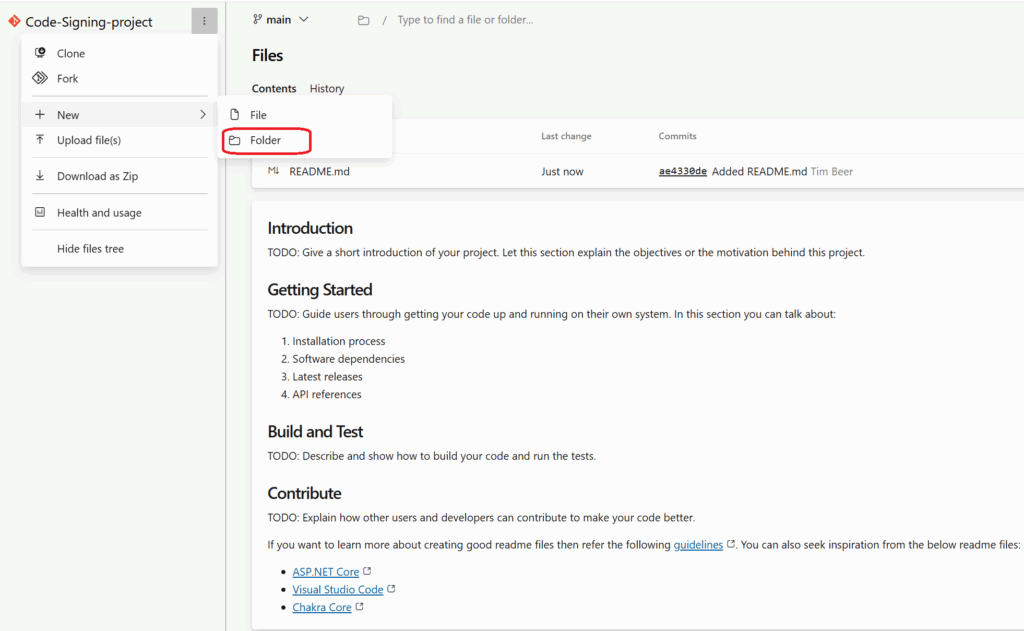
Add a file called .gitkeep inside it (this preserves the empty folder in Git)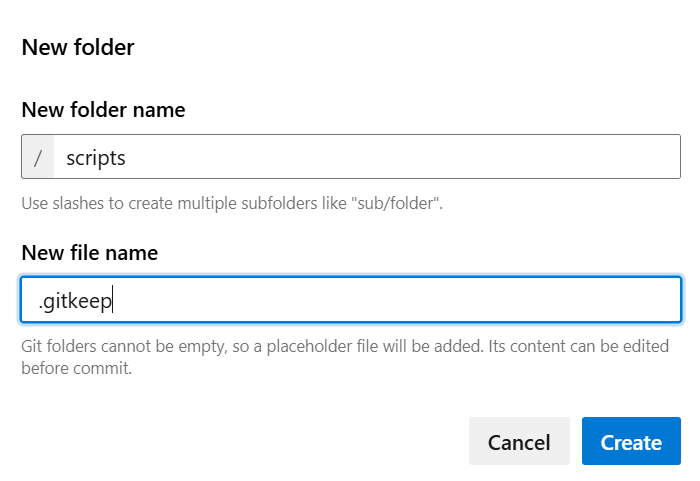
Click “Commit”

Step 4: Create the Pipeline YAML File
- In the root of your repository (not inside
scripts), create a new file calledazure-pipelines.yml - Paste the following pipeline code:

Your repository structure should now look like this:
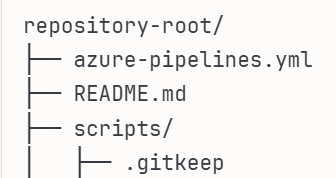
Paste the following pipeline code:
azureSubscription: ‘prod-code-signing-mi’ (change to the your service connection name in your pipeline
(Customize these two values in the YAML: Line 22: Update the service connection name:)
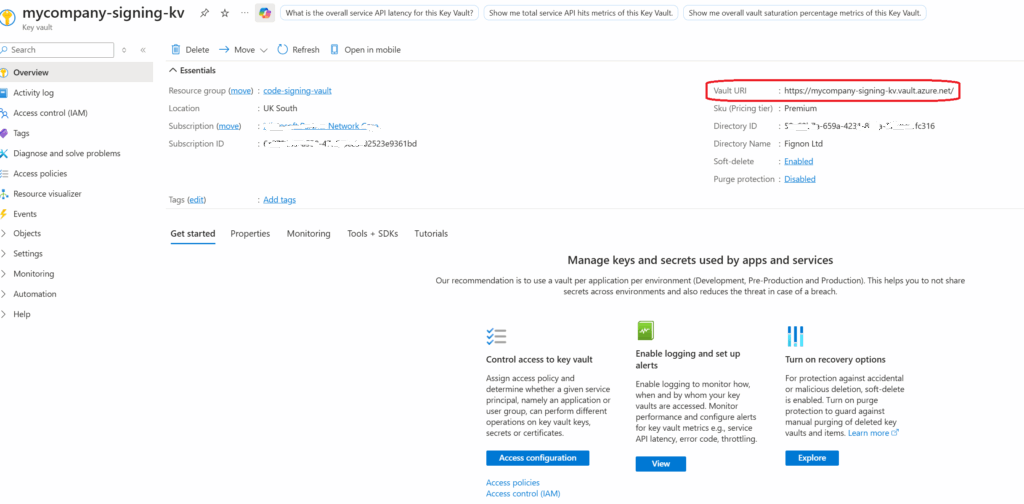
Lines 80 and 86: Update your Key Vault URL (found in Azure Portal → Key Vault → Overview → Vault URI):
trigger:
  branches:
    include:
    - main
  paths:
    include:
    - scripts/*
    exclude:
    - signed-output/*

pool:
  vmImage: 'windows-latest'

variables:
  system.accesstoken: $(System.AccessToken)

steps:
- checkout: self
  persistCredentials: true

- task: UseDotNet@2
  displayName: 'Install .NET 8.0 Runtime'
  inputs:
    packageType: 'runtime'
    version: '8.0.x'

- task: AzureCLI@2
  displayName: 'Sign PowerShell Scripts'
  inputs:
    azureSubscription: 'Enter your service Connection Name of your Piepline'
    scriptType: 'ps'
    scriptLocation: 'inlineScript'
    inlineScript: |
      # Set strict error handling
      $ErrorActionPreference = 'Stop'

      # Install Azure SignTool using dotnet tool - latest version
      Write-Host "Installing Azure SignTool..."

      try {
        # Install Azure SignTool globally - use latest version
        dotnet tool install --global azuresigntool
        Write-Host "Azure SignTool installed successfully"

        # Verify installation
        azuresigntool --version

        # Debug: Show the current directory structure
        Write-Host "Current working directory: $(Get-Location)"
        Write-Host "Build.SourcesDirectory: $(Build.SourcesDirectory)"

        # Check if scripts directory exists
        $scriptsPath = "$(Build.SourcesDirectory)/scripts"
        if (Test-Path $scriptsPath) {
          Write-Host "Scripts directory exists at: $scriptsPath"
          Write-Host "Contents of scripts directory:"
          Get-ChildItem -Path $scriptsPath -Recurse | ForEach-Object { Write-Host "  - $($_.FullName)" }
        } else {
          Write-Host "Scripts directory does not exist at: $scriptsPath"
          Write-Host "Contents of Build.SourcesDirectory:"
          Get-ChildItem -Path "$(Build.SourcesDirectory)" -Recurse | ForEach-Object { Write-Host "  - $($_.FullName)" }
        }

        # Check if there are any PowerShell files to sign
        $psFiles = Get-ChildItem -Path "$(Build.SourcesDirectory)" -Filter "*.ps1" -Recurse

        if ($psFiles.Count -eq 0) {
          Write-Host "No PowerShell files found to sign."
          Write-Host "##vso[task.setvariable variable=FilesWereSigned]false"
          exit 0
        }

        Write-Host "Found $($psFiles.Count) PowerShell file(s) to sign:"
        $psFiles | ForEach-Object { Write-Host "  - $($_.Name)" }

        # Get the current Azure context using Azure CLI
        Write-Host "Getting Azure context..."
        $contextJson = az account show | ConvertFrom-Json

        Write-Host "Current Subscription: $($contextJson.id)"
        Write-Host "Current Account: $($contextJson.user.name)"
        Write-Host "Tenant ID: $($contextJson.tenantId)"

        # Get access token for Key Vault using Azure CLI
        Write-Host "Getting access token for Key Vault..."
        $tokenJson = az account get-access-token --resource https://vault.azure.net | ConvertFrom-Json
        $accessToken = $tokenJson.accessToken

        Write-Host "Access token obtained successfully (length: $($accessToken.Length) characters)"
        Write-Host "Key Vault URL: Enter Your Keyvault URL Here"
        Write-Host "Certificate Name: powershell-code-signing"

        # Sign each PowerShell file using access token
        $successCount = 0
        foreach ($file in $psFiles) {
          Write-Host "Signing: $($file.FullName)"

          # Use Azure SignTool with access token from Azure CLI
          azuresigntool sign `
            -kvu "Enter Your KeyVault URL Here" `
            -kvc "powershell-code-signing" `
            -kva $accessToken `
            -tr "http://timestamp.digicert.com" `
            -v `
            $file.FullName

          if ($LASTEXITCODE -eq 0) {
            Write-Host "Successfully signed: $($file.Name)" -ForegroundColor Green
            $successCount++

            # Verify the signature
            $verification = Get-AuthenticodeSignature -FilePath $file.FullName
            Write-Host "Signature verification: $($verification.Status)"
            if ($verification.SignerCertificate) {
              Write-Host "Signer: $($verification.SignerCertificate.Subject)"
            }
          } else {
            Write-Error "Failed to sign: $($file.Name) (Exit code: $LASTEXITCODE)"
            exit 1
          }
        }

        Write-Host "All $successCount file(s) signed successfully!"
        Write-Host "##vso[task.setvariable variable=FilesWereSigned]true"

      } catch {
        Write-Error "Failed to install or use Azure SignTool: $($_.Exception.Message)"
        Write-Host "Full error details: $($_.Exception)"
        exit 1
      }

- task: PublishBuildArtifacts@1
  displayName: 'Publish Signed Scripts as Artifact'
  condition: eq(variables['FilesWereSigned'], 'true')
  inputs:
    PathtoPublish: 'scripts'
    ArtifactName: 'signed-scripts'
    publishLocation: 'Container'
So you need your service connection Name from here
And your Azure keyvault Url from here
- Click “Commit” to save the file

Step 5: Create and Initialize the Pipeline
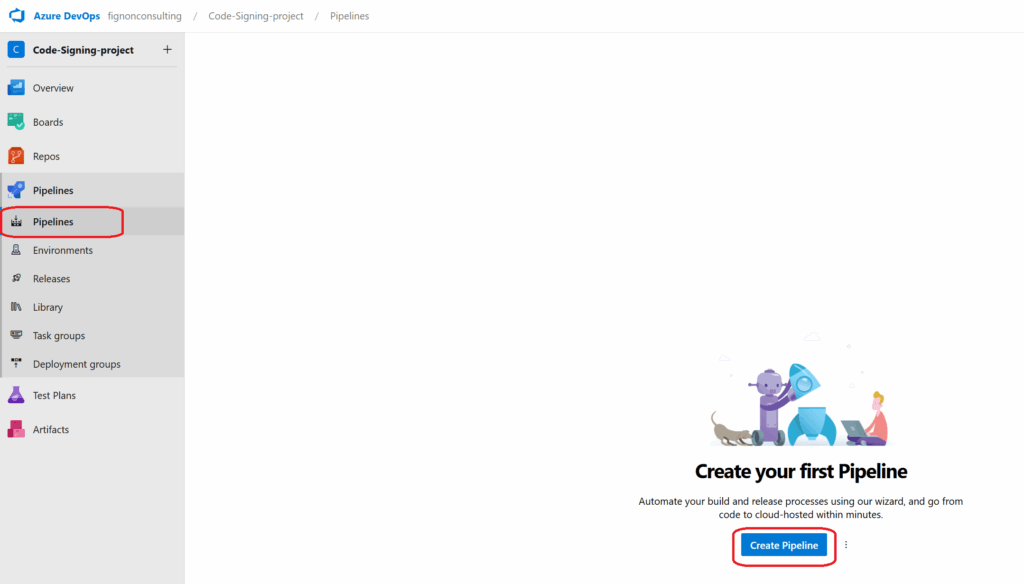
- Navigate to Pipelines in the left sidebar
- Click “New pipeline” (or “Create Pipeline”)
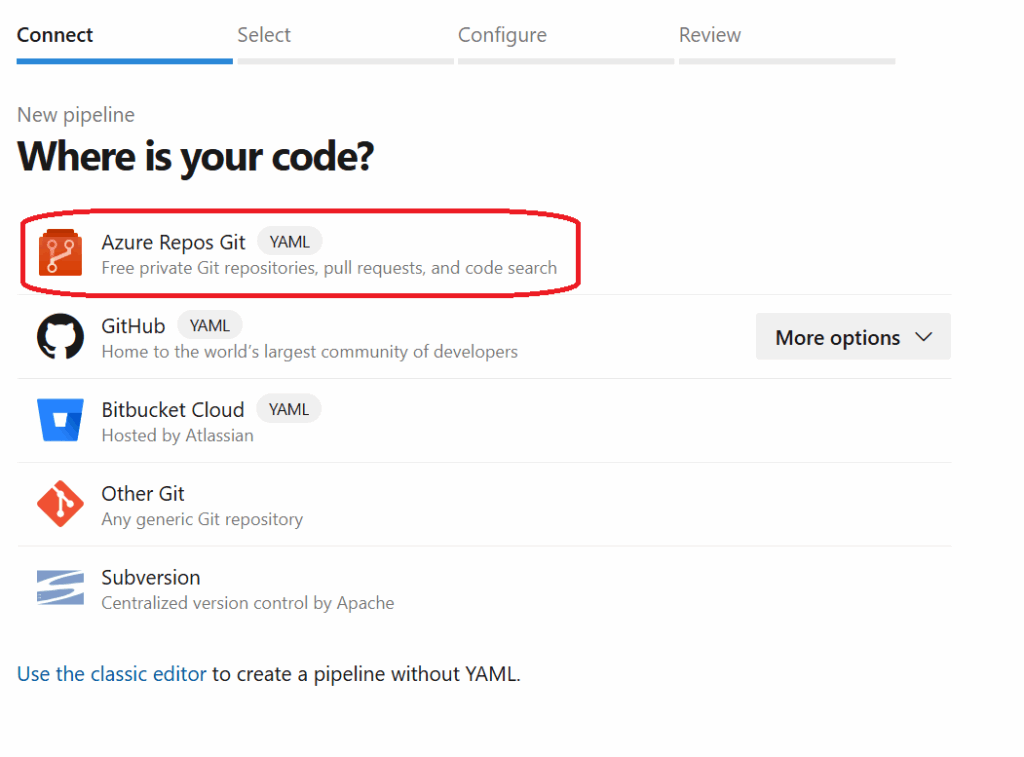
3. Select “Azure Repos Git”
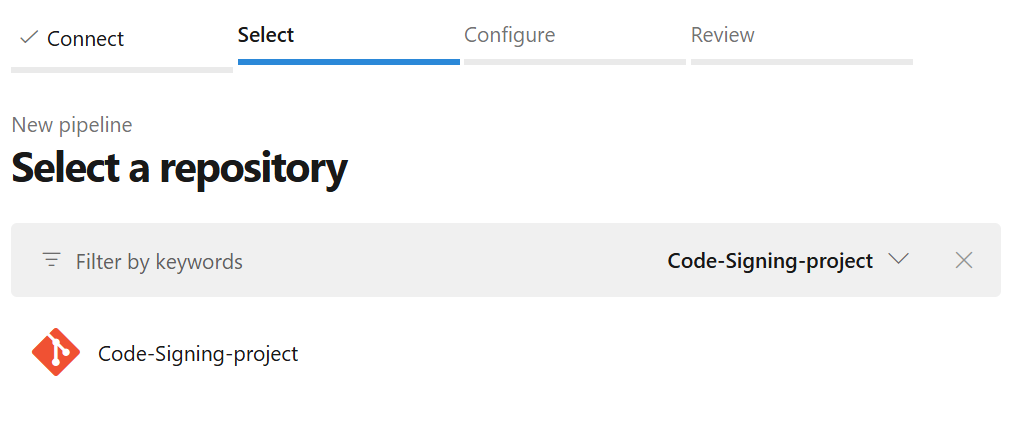
4. Select your repository (the one you just created)
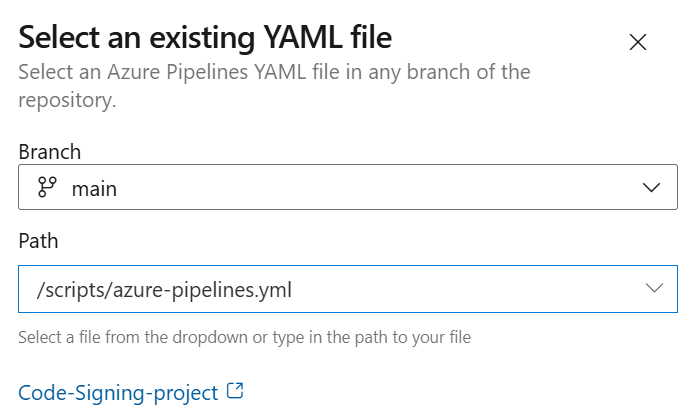
5. Choose “Existing Azure Pipelines YAML file”

6. Select your azure-pipelines.yml file from the dropdown
7. What happens on first run:
The pipeline will execute but won’t sign anything yet (no .ps1 files exist). This is expected—we’re just validating the pipeline configuration.

Hopefully the pipeline will Run
Step 6: Test the Pipeline with a PowerShell Script
Now let’s verify everything works by adding a test script.
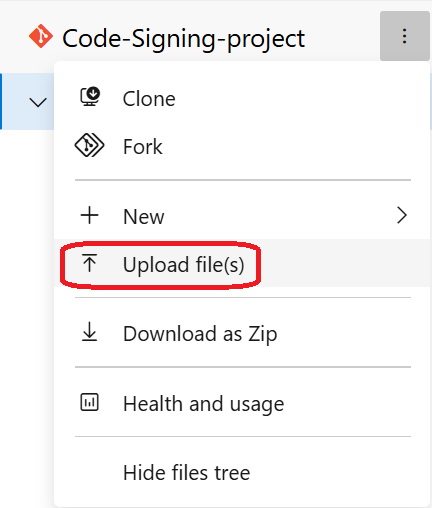
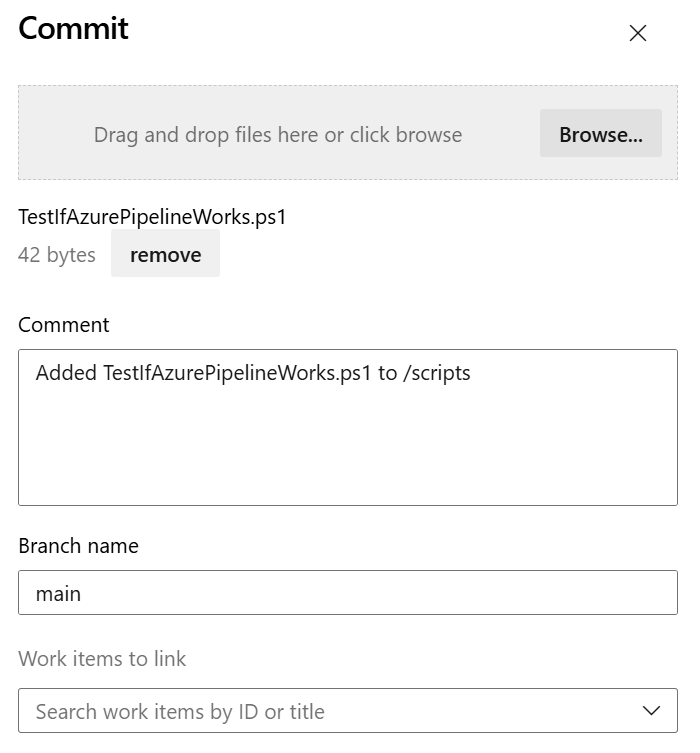
- Navigate to Repos → Files
- Go into the
scriptsfolder - Click “Upload file(s)” or create a new file
- Create a simple test script ps1 file
- Commit the file
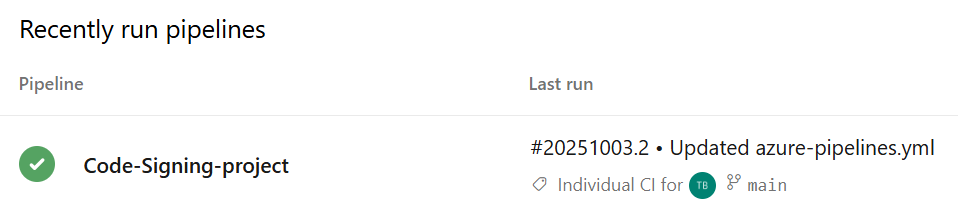
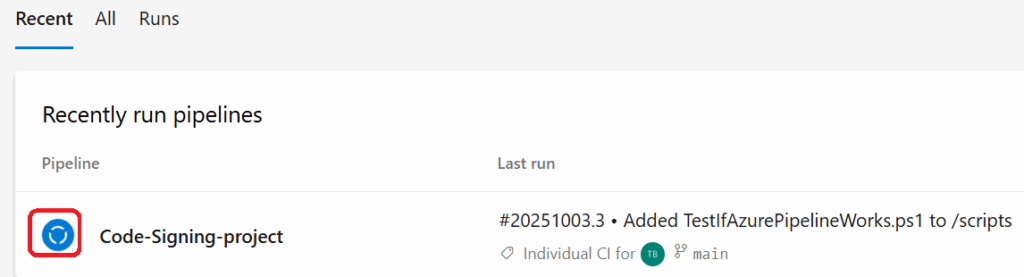
Step 7: Monitor the Pipeline Execution
- Navigate to Pipelines in the left sidebar
- You should see your pipeline running automatically (triggered by the commit)
- Click on the running pipeline to view details
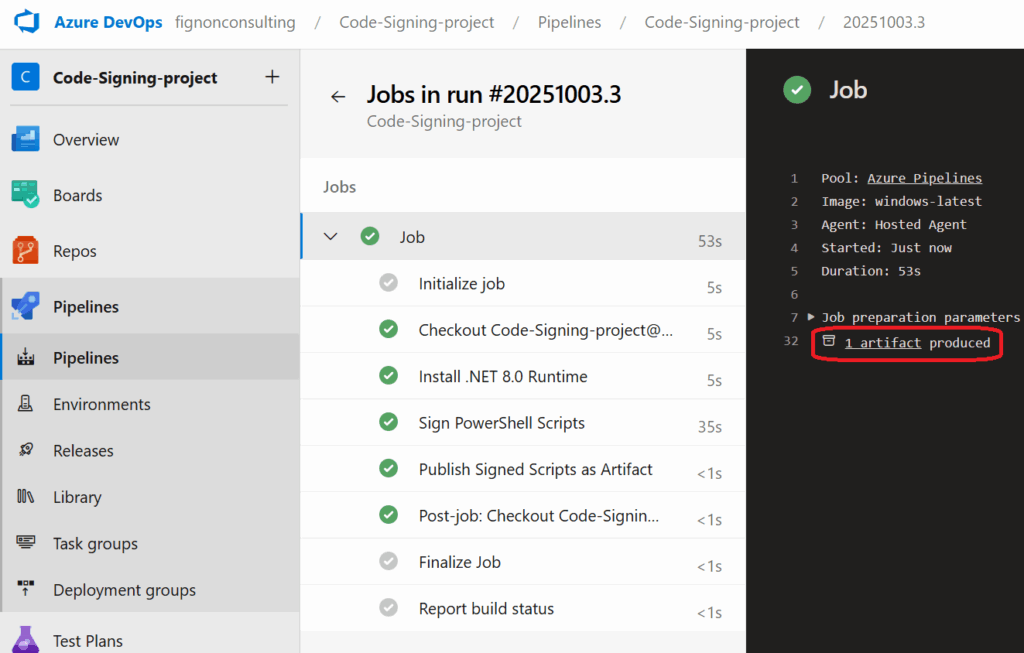
- Watch the “Sign PowerShell Scripts” task—you should see:
- Azure SignTool installation
- Detection of your
.ps1file - Signing operation with Key Vault
- Signature verification
- Success confirmation
Step 8: Download and Verify the Signed Script
- Once the pipeline completes, click on the pipeline run
- Click the “1 published” link at the top (or go to the Summary tab)
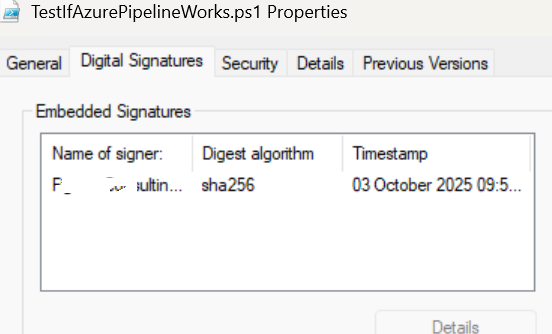
- Download the
signed-scriptsartifact - Extract the ZIP file and inspect your script
- Verify the signature on your local machine:
You should see:
- Status:
Valid - SignerCertificate: Your code signing certificate details
- TimeStamperCertificate: DigiCert timestamp authority
Understanding the Pipeline
What triggers the pipeline?
- Any commit to the
mainbranch that modifies files in thescripts/folder - This is controlled by the
triggersection in the YAML
What does the pipeline do?
- Checks out your repository code
- Installs .NET 8.0 runtime (required for Azure SignTool)
- Installs Azure SignTool via
dotnet tool - Authenticates to Azure Key Vault using the managed identity
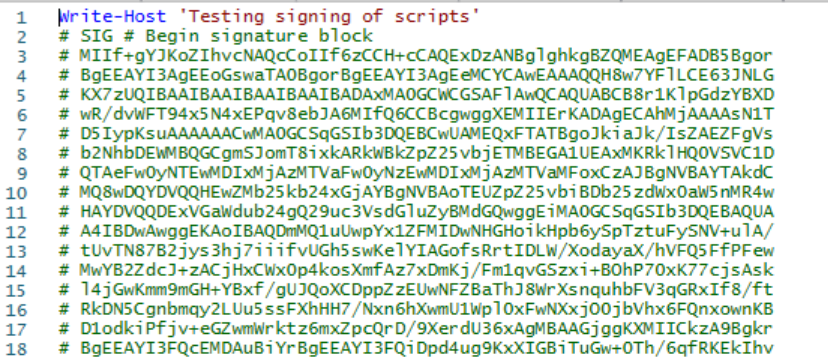
- Signs all
.ps1files in the repository - Verifies each signature
- Publishes the signed scripts as a build artifact
Security features:
- No certificates or keys are stored in the pipeline
- The managed identity has minimal permissions (only signing operations)
- All signing operations are logged and auditable in Azure
- Timestamping ensures signatures remain valid even after certificate expiration